BIKE ROOM
DESIGN GUIDE
Download the complete guide as a PDF
A well-designed bike room considers everyone’s needs, from the property owner looking to get the most value from their space to the end-user seeking convenient, functional, and secure bike parking. Taking into consideration the layout of your space, the anticipated capacity you will need to meet, and the different styles of bikes to be parked will ensure happy building owners and much appreciated peace-of-mind for end users.
Know Your Space
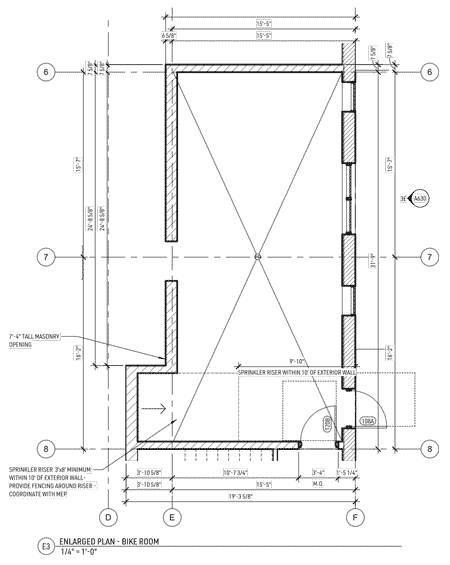
Carefully note the dimensions and details of your space, including a scalable measurement. This will expedite the drawing of your bike room and avoid issues when it comes time to install. Submitting an architectural overhead works best, but please make sure there is at least one measurement so your designer can appropriately scale the room. Hand-drawings can work too, but require much more detail.
Consider All Users

Different Spokes
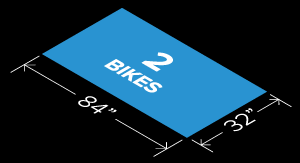
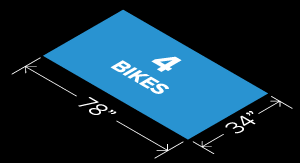
Bikes vary a great deal in size, weight, and geometry. Be sure to consider users with larger and wider bikes like cargo and recumbent bikes.

Different Folks
People’s phyiscal abilities and needs vary a lot too. Not every user has the strength to hoist a bike into a top-tier or vertical rack.
Codes and Capacity
Local codes vary greatly in how they calculate required bike parking, so researching your local qualifications or meeting with advocacy groups can help dial in quantities and spacing.

INDOOR/OUTDOOR
Be aware of indoor vs outdoor requirements. Retail facilities may require outdoor-only racks while some new developments have requirements for both indoor bike rooms and exterior bike parking.

SHORT-TERM/LONG-TERM
Bike parking is often split into classes based on duration of intended use, each with their own requirements for city codes or LEED certification.

PARKING RATIOS
Ratios for bike parking may be set by number of bedrooms, by square footage, by number of employees or by other measures. Check your local ordinances to make sure you meet the required capacity for your application.

SPACING REQUIREMENTS
Some cities have minimum spacing requirements between racks, but keep in mind that the minimum spacing does not necessarily provide the best user experience.
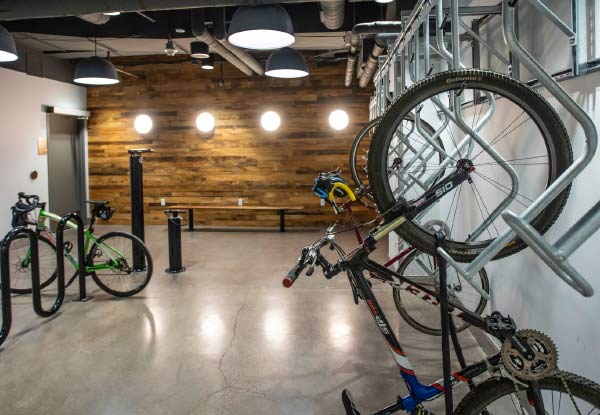
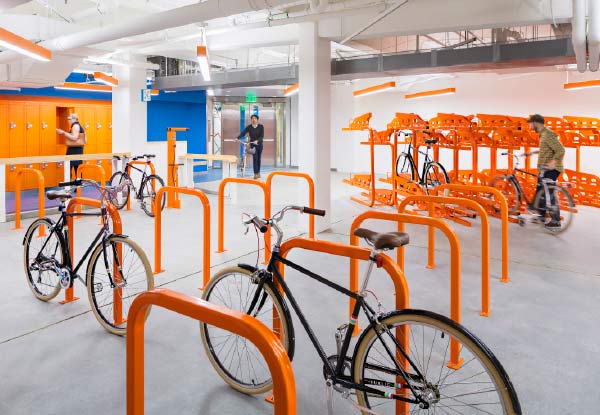
RACK TYPES
Horizontal
“Traditional-use” bike parking that is easily-accessible with a bike’s two wheels on the ground. These racks are highly versatile.
Vertical
“Max capacity” bike parking saves space on the ground by pivoting the bike onto its rear wheel and lifting it to the hook.

Two-Tier
“Premium” bike parking that offers the space-efficiency of vertical racks and the broader accessibility of horizontal racks.
(Don’t forget to factor in recommended access aisles.)
Attention to Detail
Go beyond thinking of your bike room as merely an out-of-sight storage area. Thoughtful touches show consideration for your end-user and give them even more reasons to use it.
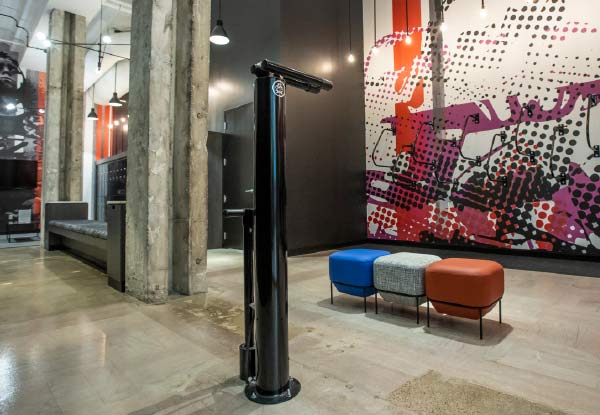
PUMPS AND TOOLS
Provide your riders the pump and basic tools they need to keep their bikes tuned up and rolling.

STORAGE
Providing lockers or a changing room will encourage users to opt for person-powered transportation to your location.
SIGNAGE
Post signs that direct people towards bike parking, Fixits, and air to keep your end-users on the right path.

MAPS AND MESSAGES
Foster a sense of community by posting maps of local bike routes, useful info, and a public message board.

ARTWORK
Do not underestimate the importance of aesthetics in not only making the room a place to park a bike, but encouraging more people to ride.

SEATING
Even a simple bench will be appreciated when it’s time to change those shoes or load up the backpack for the bike ride ahead.

E-BIKE CHARGING
Accessibility is the wave of the future and making sure your bike room has adequate outlets for e-bike charging will keep you ahead of the curve.

WASH STATIONS
Consider adding facilities for washing both bikes and people. All-weather riders will be especially grateful.
Common Pitfalls

NOT ENOUGH PARKING OPTIONS
Provide both vertical and horizontal bike parking options for those who are unable to lift their bicycles onto vertical racks. Work with your designer to hit your quantities while making sure your parking is accessible to all end-users.

NOT ENOUGH AISLE SPACE
Aisle space is incredibly important for people to maneuver their bikes and to not feel cramped. Injuries and damage to bikes are more likely to occur when not enough space is provided between racks.

INSUFFICIENT LIGHTING
Users shouldn’t have to worry about tripping hazards or bumping into things especially if the area is a corridor with light only at the front.

POOR ACCESS
Avoid steps, too many hallways, and corridors to gain access. Instead, locate your bike room near elevators and convenient places that have easy access to rest of the property.
Leading by Example
Welcoming Entrance
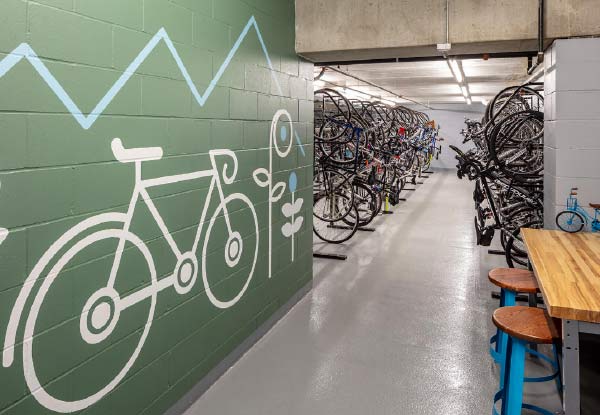
Friendly graphics, bright lighting, and a convenient work table greet riders at the entryway to this bike room.
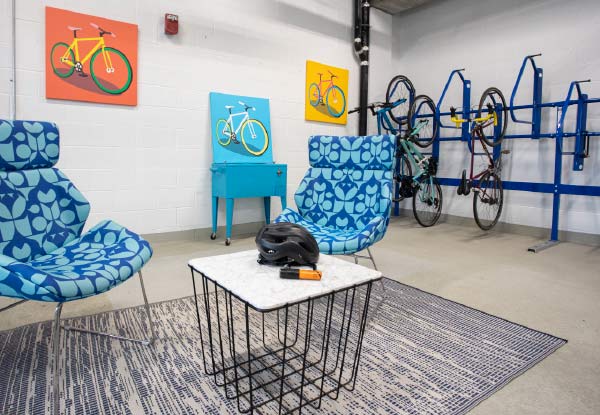
Chill Vibes
A couple of comfortable chairs and bike-themed art invite cyclists to relax and hang out before or after their ride.
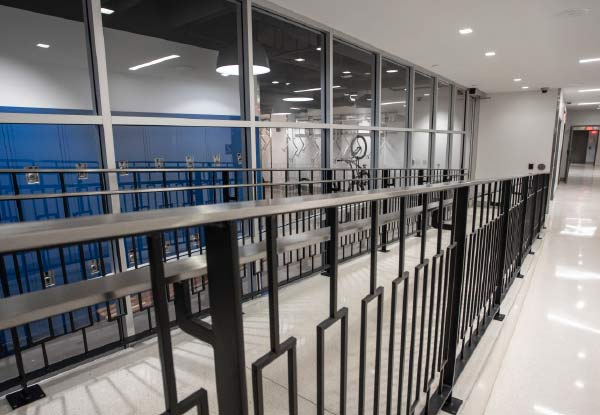
Convenient Access
A ramp from an elevated outdoor entry point lets people on wheels roll easily to this bike room.
Amenity Rich
This room includes bike racks, a repair station, lockers, restrooms, and a lounge area.
Checking All the Boxes
Multiple parking options and public tools, along with places to change, clean up, and store items make this simple room very convenient.
A Bit of Everything
Well-lit and spacious, with loads of useful amenities and parking options, this building’s bike room is a top selling feature.
Free Layout Service
Many considerations go into building a great bike room, and our experienced sales team is prepared to help. They are well-versed in bike-parking design and are dedicated to providing the best possible layout for your space. Fill out the form below to discuss how we can assist with your project!
Let’s get started!